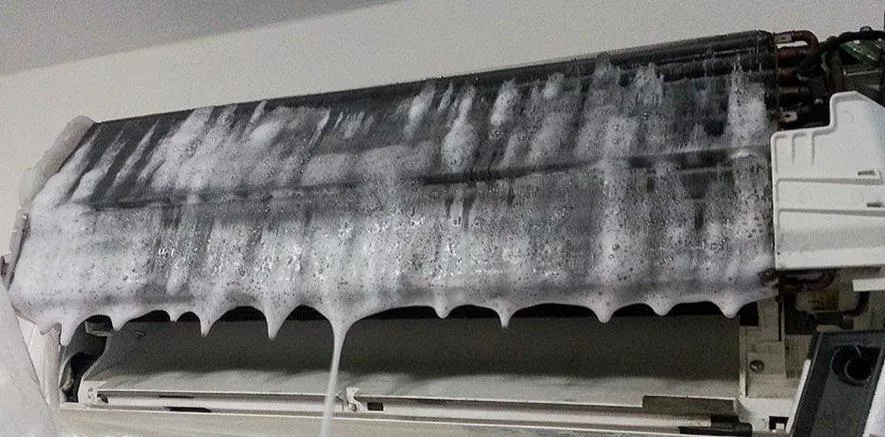
An aircon overhaul is the most thorough thing you can do to an indoor unit short of replacing it. It is also the job most likely to leave you with a question the next morning, because every part that matters was taken off and put back: covers, casing, blower wheel, drain tray, and the electrical board inspected and dusted.
So when the unit drips on day two, or makes a sound it never used to, the question is: is this the machine settling after a deep clean, or did something go back together wrong? Here is how to tell, what to check in the first week, and how to report it so one return visit fixes it.
Why the first week is when overhaul problems show up
A general service works around the parts. An overhaul takes them apart. Our chemical overhaul page lists what that means: full disassembly of the indoor fan coil unit, individual chemical cleaning of every component, the blower wheel cleaned and balanced, PCB inspection and dust removal, the drain tray and pipe pressure-cleaned, then full reassembly and a 5-point performance test before the technician leaves.
Every one of those steps ends with something being refitted: a drain tray that has to sit square on its outlet, a blower wheel that has to be tightened on its shaft, connectors on the board, clips on an old casing. If one is slightly off, it rarely shows while the technician is standing there. It shows after a few hours of running, or the first night the unit runs until morning. That is why an overhaul comes with a workmanship warranty at all — ours is 90 days — and why the first week is the part of that period that actually counts.
What is normal after an overhaul
Some changes are the overhaul working, not failing. None of these needs a callback on its own:
- More air, and a room that cools faster. A blower wheel cleaned back to bare blades moves more air than one coated in dust and biofilm. The fan can sound slightly different — a fuller rush of air, not a new mechanical noise.
- A faint smell of the cleaning treatment at first switch-on. It should be faint and it should fade over the first day or so of running. The test is direction: fading is normal, getting stronger is not.
- Remote settings back to default. Power to the unit is isolated for the work. Depending on the model, timers, swing settings or the last mode may not survive that. Reset them once and see whether they hold.
What is not normal — and what it usually points to
1. Water dripping from the indoor unit. The drain tray came out, was pressure-cleaned, and went back in. A drip that was not there before the overhaul, especially one that starts after a few hours of running, points first to a tray that is not seated properly or an outlet connection that was disturbed. Treat it as workmanship until someone shows you otherwise. Put a towel down, switch the unit off, and message whoever did the job. If the drip was there before the overhaul and is still there, the cause may be further down the drain run — our post on a drain that keeps choking explains why cleaning alone does not always hold.
2. A new rattle, tick, knock or scrape. We publish the common causes. A loose blower wheel needs to be re-tightened, and on our jobs that is a free fix. Bearing wear is the other: the bearing was probably failing before the overhaul, and the cleaning revealed the noise rather than caused it — a bearing replacement is quoted. A third, less common sound is refrigerant flow noise, which can point to a system that is over- or under-gassed and needs a gas check. A short phone video with the sound on is the most useful thing you can send. For a wider guide to what each sound means, see aircon making noise.
3. Not as cold as before, or not cold at all. Ask one question first: was it cold before the overhaul? If it was, and now it is not, something changed during the visit and it needs looking at. If it was already weak before the overhaul and is still weak, the overhaul may simply have been the wrong answer. Cleaning restores airflow; it does not put refrigerant back or fix a tired compressor. Our overhaul page says as much — older units, or those with a worn compressor, improve but may not fully recover their original performance. Gas top-up or leak repair covers what the next diagnosis looks like.
4. A blinking light, an error code, or a unit that will not start. Check the isolator and the breaker first — they are switched off for the work and are occasionally left off. If power is on and the unit still flashes or will not start, write down the blink pattern or the code before touching anything. The board was handled during the overhaul, so this is a question for the technician, not something to keep resetting. Our note on an aircon not turning on has the full checklist.
5. A smell that gets worse, or a musty smell that comes back within days. A fading chemical smell is normal. A musty, sour smell returning in the first week is not — it suggests a part that holds the smell was not fully cleaned, usually the blower wheel or the drain tray. Those are the two parts an overhaul exists to reach, so it is fair to ask for them to be looked at again.
6. A cover that will not close, a sticking louvre, or a gap along the casing. Clips on an old casing can crack when it is opened after years. Sometimes that is unavoidable, but the technician should tell you before leaving, not leave you to find it.
The first-week check, in order
None of this needs tools. Do it on the first evening and again a few days later:
- Run each unit on its own for a proper session, not just a few minutes. A drain fault may only show once the coil is fully wet and water is flowing.
- Look under each unit after it has been running. A dry tissue held along the underside and at the pipe side shows a slow drip long before it reaches the floor.
- Listen at switch-on and at switch-off, when the fan changes speed, as well as while it runs.
- Check the swing and the louvres through their full travel. Look for anything catching or stopping short.
- Note anything by unit, not by flat. "The master bedroom drips after about an hour" gets fixed in one visit. "One of them is leaking" gets a technician who has to find it first.
How to report it so it is fixed in one visit
Send the company that did the overhaul — not a different one — a single message with:
- the date of the overhaul and which units were done;
- which unit has the problem, and exactly what it does;
- when it happens — at switch-on, after a certain amount of running, only at night;
- a photo or a short video, with sound if it is a noise;
- whether the unit did this before the overhaul.
That last point separates "the work caused this" from "the work revealed this", which is the honest basis for deciding who pays. On our jobs the rule is published: WhatsApp us with the issue, we come back and re-diagnose at no cost, if the failure is related to our work the fix is free, and if it is an unrelated new issue we quote it transparently. Any company that did your overhaul should be able to tell you its own version of that rule before you book.
If you used another company and they have stopped answering, what a workmanship warranty actually covers explains what you can reasonably expect from them and what to keep in writing.
Workmanship or the machine?
Not every fault in the week after an overhaul was caused by it. An old unit under close inspection sometimes shows faults already on their way — a worn bearing, a weak capacitor, a tired compressor. Our repair work carries 90 days on workmanship, with the manufacturer's warranty applying to parts; a cleaning warranty does not stretch to cover the machine itself.
The fair test is simple. Did the problem appear after the overhaul, in a part that was handled during it? Then it is workmanship until shown otherwise. Did it appear in a part nobody touched, on a unit that was already struggling? Then it is the machine, and the useful conversation becomes repair versus replacement — see when to replace your aircon versus keep repairing it.
Make next week easier before you book
The easiest after-overhaul question to settle is one you prepared for. Record a short video of each unit running the day before — sound, airflow, any drip — so there is evidence of what it did before anyone opened it. Tell the technician at the start which unit rattles or drips. Ask to see the blower wheel and drain tray while they are out (see what your technician should show you before they leave), and be home at the end to watch the units run. What happens on the day of an overhaul covers the rest.
For reference, our overhaul prices are published on the pricing page and the displayed price is the final price: $200 for one unit, $370 for two, $515 for three, $640 for four, and $150 per unit from five units. Each includes the 9-point pre-check, full disassembly, individual component cleaning, anti-rust treatment and a 90-day workmanship warranty. Allow about 2 to 3 hours per indoor unit.
Something not right after an overhaul?
Tell us which unit, what it is doing, and when the overhaul was done. If it was our job, we come back and re-diagnose at no cost. If another company did it, go back to them first — the warranty is theirs. If that goes nowhere, a repair visit from us starts with the 9-point pre-check (the $45 minimum for one unit covers the visit and the diagnosis), and we will tell you whether it looks like a reassembly problem or a separate fault before any further work is quoted.
WhatsApp us on 9107 2601 — usually a reply within five minutes.